Looking for a new room theme? Turn your bedroom into a Paris getaway with some of these inexpensive ideas! 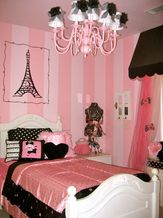 Color scheme- the typical colors for a Paris themed room are pink, white, and black! This doesn't mean every item in your room has to be these colors but try to stick to this color scheme as much as possible! If you are painting your walls look for a light pink.
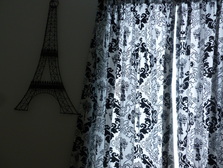 Curtains- some long curtains can really add to your room! Pick out a pattern that fit the color scheme and has a good design. These Paris curtains I have in my room are black and white and have swirly designs and chandeliers.
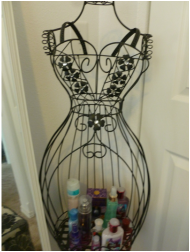 Mannequin- Add the Paris love of shopping with a mannequin! You can find inexpensive mannequins like this at stores with room decorations such as TJ Maxx and Ross.
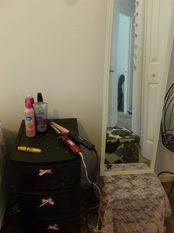 Hair styling side table- every girl needs a spot to get ready in the morning. If you don't have your own bathroom a personal styling station could be just what you need in your room! I bought a black 3 drawer side table which I use to store make-up, hair styling tools and products, and hair accessories. You can spice up a normal black side table or stackable drawers with some pink ribbon, which can be tied into bows and hot glued on. Put your drawers next to a tall mirror!
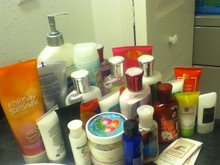
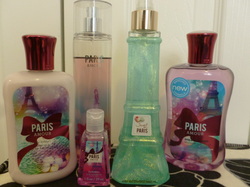 Fragrances and Perfumes- Your room looks like Paris so why not smell like it too? Bath and Body Works has a huge variety of Paris themed scents including Paris Amour, Paris Nights, Sweet on Paris, Paris in Bloom, and even Paris for Men. You can buy perfume, lotion, shower gel, soap, glitter gel, and more in this Paris scents! And if you aren't into body things you can get candles in their Paris scents too!
 French Memo Board- ditch the boring bulletin board for a cute french memo board to display photos, notes, and more. This memo board was less than $10 at Ross and matches the room perfectly!
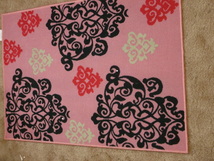 Rug- for all those rooms with boring carpet, lay down a colorful inexpensive rug to add personality and color!
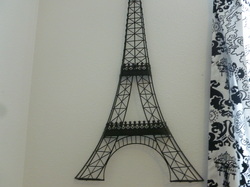 Wall decorations- With Paris being an extremely popular theme lately, there is so many wall decorations available! From an Eiffel tower clock to a huge Paris wall canvas you will have no trouble finding decorations. Don't buy everything and fill every inch of your wall space, but pick a few things you love most to accent the room.
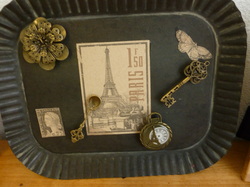 DIY decorations- If you don't want to spend alot of money on decorations go to your local craft store to make your own room decor. I recently went to Ben Franklin's and made this magnetic board from scrapbooking paper, charms, magnets, and a antique-looking serving tray. I glued pieces of scrap booking paper to the tray and let that dry. Then I hot glued the charms to small magnets which stuck to the tray. I can use it to hang pictures or just to decorate my room alone. This is just one example of how you can make your own room decorations. Get creative and crafty!
Counting down to Christmas? Try to complete this winter bucketlist before Christmas! Here is 10 things to do this winter!  Have a winter photoshoot- Grab some friends or a sibling and take turns taking pictures of eachother in the snow or in cute winter outfits! Need some posing? Throw snow up into air or blow a handful of snow.
 Watch a classic Christmas movie- Get in warm PJs, make some hot cocoa, and settle in for a holiday movie! Some fun movies are: Frosty the Snowman, Elf, The Santa Claus, or Miracle on 34th street!
 Have a secret santa group- Gather some friends and play secret santa! Put everyone's names on a slip of paper and let everyone pick a slip. If they pick their own name have them put it back and draw again! Make sure everyone keeps the name on their slip a secret! The name they drew is who they will be a secret santa for. Every day or week (depending on how early you start before christmas or how you want to play) secretly leave a small gift for your person to find later. You can even decorate their locker at school with bows and ribbon. On Christmas you will all reveal yourself.
 Make a winter playlist- Fill it with your favorite Christmas carols and songs to play whenever you need some holiday spirit!
 Decorate your room- decorate your room with holiday decorations and put up a small tree or wreath! Hang lights up around your window or doorframe.
 Buy a holiday candle- There is all sorts of holiday scented candles from candycane to gingerbread, and about any other holiday scent in between! Buy your favorite scent and light it in your room. If you can't light candles then try the wax melters or incense sticks.
 Make christmas cookies- Cut the cookies out in holiday shapes and decorate them. Then wrap them in cute bags or holiday tins and deliver them to your neighbors as a holiday treat!
 Look at Christmas lights- Drive around some neighborhoods listening to christmas music and looking at Christmas light displays.
 Send gifts or letters in the mail- Nothing is like getting an unexpected letter or package in the mail from a loved one! Suprise a friend by sending her gift in the mail even if she lives close or drop it off on her doorstep to find when she gets home. If you don't want to send gifts write a bunch of letters to all your friends and family and send them out!
 Donate or volunteer- Help a charity in need this holiday season! Bring toys to an orphanage or hospital, canned goods to a food bank, or blankets and clothes to a homeless shelter. Whatever it is, even if its small, it will make a difference in someone's life!
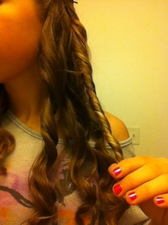
 Hi guys! This is my first celebrity inspired hair tutorial! If you like this please comment and let me know any other celebrity hairstyles you want me to do a tutorial on! Anyways, I absolutley LOVE Ariana Grande's beauty loose curly hairstyle in her music video "Put Your Hearts Up." I obviously don't have her gorgeous red hair but I did my best to recreate this look in a way that works with almost any hair type! Enjoy (:
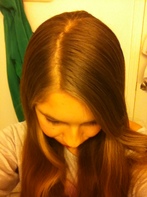 STEP 1: Part your hair to one side. Sorry for my messy hair, I did this tutorial right before bed and my hair had previously been in a ponytail so it was a mess! Anyways, you will need to part your hair to one side about at the arch of your eyebrow and brush out any tangles. If you want you can rub in some curling gel or curling lotion.
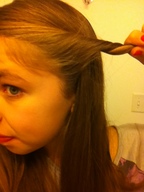 Step 2: Grab a chunk of hair about to behind your ear and twist back. Sorry in this picture I didn't quite grab enough hair! So to get more of Ariana's look, grab to right behind your ear! Twist the hair back and bobbypin it in place.
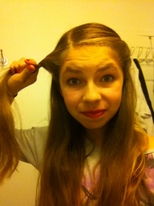 Step 3: Repeat step 2 on the other side. Again I didn't quite grab enough hair in the picture but do the same on the other side. It should be less hair than the first side because of your side part. Twist it back behind your ear and bobby pin it in place.
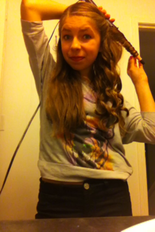 Step 4: Curl your hair. Grab medium sized pieces of hair and curl AWAY from your face. I'm using my Conair curling wand but you can use a clamp curling iron too. I find though that curling wand curls tend to combine together better which will be useful because we will be combining the curls later. Make sure as your curl your hair that you continue to curl away from your face or the curls won't combine later.
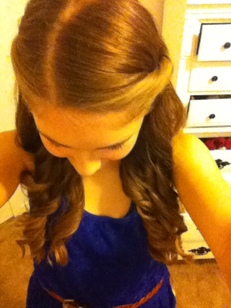
 Step 5: Combing the curls. Once your hair is all curled you will combine the curls. Pick up several curls. You will be making 3 big curls on both sides so depending on the size of your curls pick up about 2-4 curls.
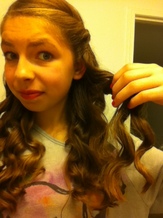
 Twist those curls together and spray with some flexible hold hairspray if you want. Let the twist go and they should combine into a bigger curl. Pick up a few more curls on that side and twist them. Do this so all your curls create three big loose curls on each sides of your head.
 You are done! The curls will loosen up a bit over time. You can lightly spray them with hairspray if you want, but this is your finished look! I hope you enjoyed this tutorial!
Hi girls! As I'm sure you all know, stress is not a fun thing to deal with. If you have ever been stressed, as I'm sure you have many times, you feel angry, upset easily, or even sad. It can completely ruin your day or even week. Stress is especially common in teenage girls. Here is just a few things you can do relieve yourself next time you find you are stressed.
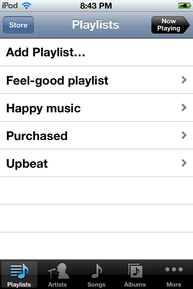 Listen to music (Feel-good playlist)-create a playlist with all the songs that make you feel relaxed or happy whenever you listen to them. Maybe it's that one Taylor Swift song that just makes you want to smile or a One Direction song that you are absolutely in love with. Whatever it is, you will have your "stress-reliever playlist" at hand whenever you are feeling upset. Listening to music can help you relax and calm down as your prepare yourself to deal with your everyday tasks and life challenges.
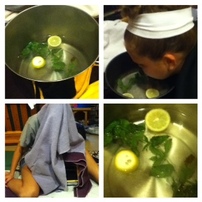 Face steams- Yes, this sounds like a funny thing to do, but at least for me, this is one of my favorite and most effective ways to relieve stress. Think personal facial spa or sauna! Start by boiling about half a pot of water (any pot about the size of your face or bigger will work.) Cover the boiled water with tin foil to keep in the heat. Find your favorite scents, ones that make you feel relaxed, such as mint, lemon, tangerine, lavender, or vanilla. Add the scents into the water in either fresh form or scented extracts and oils. For example, a few drops of tangerine oil and a few lemon slices. My favorite combination is fresh mint leaves and lemon slices. Next, wash your face and pat it dry, then pull your hair up and out of your face. Place your pot carefully on a stool or on the ground and remove the tin foil. Put your face above the water (be careful not to touch the water or pot, it will be very hot) and drape a towel over your head to trap the steam. Relax in the scented steam as long as you want or until the steam wears off. Keep water nearby to sip on and stay hydrated. If you try this please comment what you think and let me know your favorite scent combinations!
 Talk to a friend- Call your best friend up on the phone or go on a walk with buddies. Hanging out with people you love can help relax you and relieve your stress. That's not saying spend hours on the phone instead of finishing your science project...procrastination will only add to your stress later! But spending a little time to just relax and talk can really help.
 Exercise- have you ever heard of going on a run when your stressed? Seems like the last thing you want to do to relax, but studies show exercise actually reduced your stress levels. So if you are feeling stressed, instead of watching TV go outside and go on a jog or play a little soccer. Whatever you love to do that can get your heart pumping.
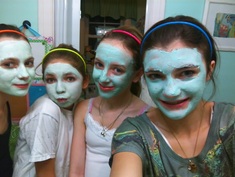 Face masks- Treat your face as it starts to dry out in the cold with a relaxing face mask! To get rid of dead skin use a peel off mask. Start by washing your face and patting it dry. Then pull your hair out of your face and apply a store-bought peel-off mask. Relax by listening to music or watching TV while it drys. Once it is dry, peel it off for amazingly smooth skin! Apply some unscented or sensitive-skin lotion to keep moisture in your skin. If your face breaks out easily or is very oily don't apply lotion. You can also buy other types of face masks such as mud masks or you can make your own! One recipe is to combine oats with honey and pat it onto your skin. Facials will leave your skin feeling fresh, soft, and bright!
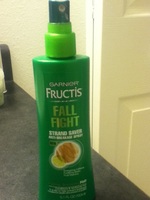 Protect your hair- Dry, cold air can really damage and dry out your hair, as well as giving it unwanted split ends! Keep it soft and moisturized with an anti-breakage spray or conditioner. I have recently been using Garnier Fructis Fall Fight strand saver and anti-breakage spray. You can spray this product on damp or dry hair and massage it into your hair. It conditions and strengthens hair to make it softer and prevent breakage. If you don't want to buy a product such as this one, try using olive oil! At night rub a small amount of olive oil on the ends of your hair or even throughout your hair (caution if you have thin hair this may make hair look oily.) Olive oil naturally softens, strengthens, will even moisturize your hair!
*I was not paid to advertise Garnier Fructis Fall Fight it is all my own opinion.
 Keep your skin moisturized- it can be hard to keep your skin soft and moisturized with hot showers, blasting heaters, wind, and dry or cold air drying them out, but don't worry! You can follow just a few simple tips to help have soft skin even in the harsh cold. First remember to DRINK WATER! You have probably heard this a million times but it's true, water is one of the best ways to hydrate your skin and avoid cracked lips and heels. It can be hard to drink water, especially for me, so try a tasty mix-in or flavored water. Secondly, avoid hot showers. Steaming water might feel nice in the cold but its sucking moisture from your skin. Turning the heat down a little will help your skin a lot in the long run. Finally, apply a moisturizer. Treat yourself to a new lotion or creme in your favorite scent! If you have cracked heels or lips rub some olive oil (it works for more than just hair) on your skin!
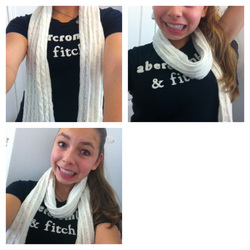 Style 1: The simple wrap-around- Start by just hanging the scarf on your neck. Next, take one end and wrap around your neck, then let it hang down. Adjust the scarf so both ends are even. You can loosen the middle part to fit your style. This is probably one of the most simple ways to wear a scarf but it is very cute with almost any type of scarf!
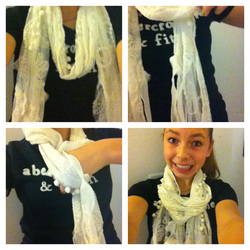 Style 2: Simple wrap-around inside-out- drape the scarf around your neck in the simple loop (shown above.) Now take the right end and pull it through the middle loop. Next, take the left end and pull it through the middle loop. Adjust the ends and middle loop so fit comfortably!
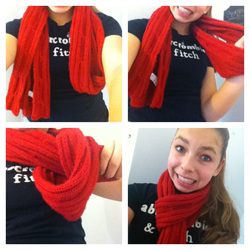 Style 3: The Parisian Knot- Start by folding your scarf in half and hanging it on your neck. There should be a loop on one side and the two ends on the other side. Take the two ends and pull them through the loop. Pull it through tightly then loosen the scarf so it fits comfortably. It's that simple! This style I like in the fall and winter because it keeps your neck really warm!
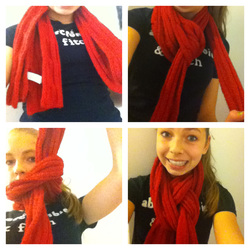 Style 4: Parisian Braid- Start with you scarf folded in half and draped over your neck as if you are doing the parisian knot (shown above.) Instead of pulling both ends through the loop, only pull one end through. Then take the other end and pull it under rather than over, to create a cool braid look. Adjust the scarf to fit comfortably.
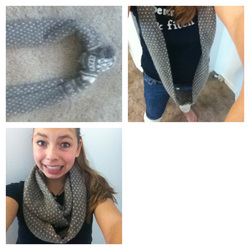 Style 5: DIY infinity scarf- One very popular scarf is the infinity scarf (also known as the loop scarf or circle scarf!) If you don't have one you can easily make one out of any normal scarf! All you have to do is tie the ends of your scarf together to create a big loop. Like any infinity scarf, you put the loop around your neck and loop it as many times as you like or until it doesn't loop any more. Then you can loosen and adjust the loops to fit comfortably!
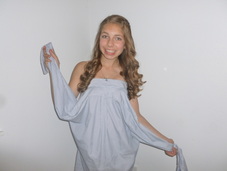
Hey girls! This is a quick and simple tutorial on how to turn a men's button up shirt into a cute strapless dress! It is SO EASY and it doesn't require any sewing or cutting. There is so many styles of dresses you can make but this is just on one of the many styles! Comment what you think of this cute ,do it yourself, dress!  Step 1: Find an old button up shirt that you can use! I went to a thrift store and bought a couple old shirts for only a few dollars but you can also ask to borrow one of your dad's or older brother's shirts. The longer the shirt, the longer your dress will be, so keep that in mind when your picking out a shirt. Also try to avoid shirts with thick cuffs on the sleeves because they don't look as good and are harder to tie.
 Step 2: Put the shirt on like a strapless dress with the buttons in the back, and button it up as high as you can. It doesn't have to button up all the way! Leave the sleeves hanging in the front, and adjust the dress so it fits comfortably.
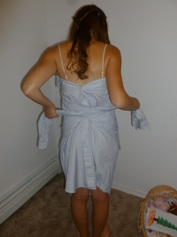 Step 3: Bring the sleeves to the back and tie them. Make sure they lay smoothly when you pull them back.
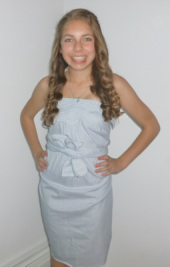 Step 4: Bring the sleeves back to the front and tie. Adjust the ends to make a bow shape. That is your completed dress for this style! I hope you enjoyed this tutorial!
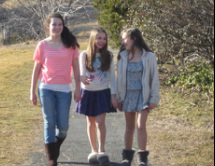
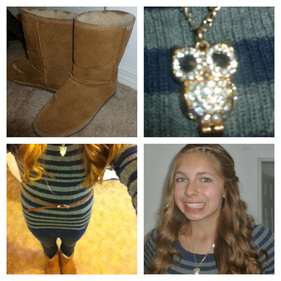
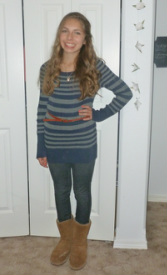 The cooler autumn weather is just starting to roll in, which means we can start bringing out some of our cute and cozy fall clothing. Today I paired a long cotton sweater with some dark jeggings, boots, a belt, and a cute necklace to create this casual and cute outfit, that you can easily accomplish yourself. If you don't have a body-con style sweater dress look in your older sister's closet for a sweater that is a bit too long or big for you and if needed stretch it down to make it longer. This will create the tight fitting sweater "dress." Next, put on your favorite tight fitting jeggings or leggings (I liked the jeans look for this sweater.) Accessorize with a long necklace (I'm wearing an owl necklace from Claire's.) Tie the outfit together with a belt to add shape and a bit of personality to the outfit. I've found this outfit looks cute with almost any boots, I wore my Bearpaw boots but really any will work so get creative. For my hair I decided to go with a style that has been extremely popular lately, french braids! I parted my hair to the side and french braided to about my ear, then pinned it back with bobbypins, and curled my hair with a wand curler. That completes today's OOTD (outfit of the day.) Please comment below what you think!
Lots of Love,
Annelise <3
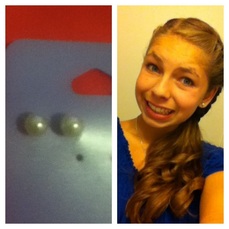 Hey girls! I have gotten a few requests to make a post about my current fashion obsession, so today I had some free time before soccer practice and I decided to post about my latest obsession: pearl earrings! My sister got a pair of pearl earrings for her birthday a few months ago and one day I decided to wear them to a fancy dinner. I got lots of compliments (the first sign of a great accessory.) The next day, I threw on a sweatshirt preparing myself for a cozy laid-back day. I had forgotten to take off the pearls but noticed they gave my cozy outfit a whole new look I loved. All this to say, I fell in love with them! I wear pearl earrings EVERYWHERE, and they always seem to match and add a cute touch to any outfit. If you aren't looking to spend a lot of money on real pearls, I've found fake ones look just as good! Comment below what you think :)
~Annelise <3
 Bandanas are a cute way to add personality to a ponytail, bun, or any hairstyle! Recently, they have been one if my many obsessions, especially as the cool weather rolls in and I'm starting to wear more cozy sweatshirts. You can wear bandanas in SO many ways! This "how-to" is one of my favorite ways, what i call the "bandana bow." I hope you enjoy :)
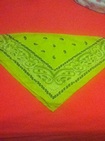 Step 1: Choose any square bandana and fold one corner to the other to make a big triangle shape.
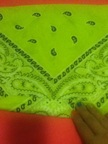 Step 2: Starting at the bottom corner (where the flaps unfold) start folding it upwards. You can fold as thick as you want depending on how you like it.
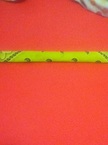 Step 3: Fold all the way up to the top! Your bandana should look like the picture shown!
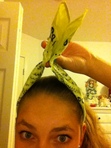 Step 4: Now place the bandana on the underside of your hair/head so the ends are up on the top of your head. Try to make sure the ends are equal in length.
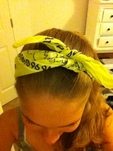 Step 5: Tie the ends twice so you the ends look bow-like. If they are too long you can tie it again to shorten them. Play with the ends until they look how you like.
 Now you are finished! I love this look with ponytails and messy buns but you can do it with any hairstyle you like! Comment below what you think!
Thanks,
Annelise <3
|
 RSS Feed