Ever since Macklemore has been singing about it, thrift shopping has become more and more popular! Not only is it a great way to get inexpensive clothes, but it is also a lot of fun! But, thrift shopping can be overwhelming and difficult if you don't know what you are doing! Here is some helpful tips to make your next thrift shop trip as successful as possible.
Picture
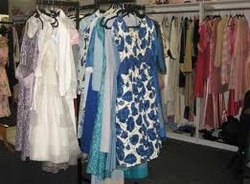
Tip 1: Find a good thrift shop- Not all thrift shops will have what you want! Look at all the thrift stores in your area to find the one that you like best. That doesn't mean you should totally avoid the other ones though because thrift shops get new things in almost every day! 

Picture
Tip 2: Search EVERYTHING- Believe me, I know, a lot of the items in the store will be ugly and pointless. But don't forget to keep an open mind about things! Just because you are finding mostly ugly clothes doesn't mean there isn't anything you will like. My biggest tip I could give you is to search everything! The best items are really hidden, so go through all the racks and all the sizes. 

Picture
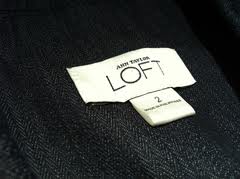
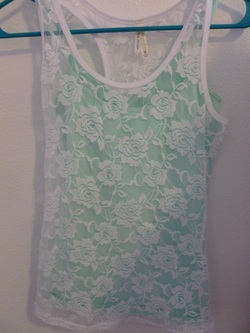
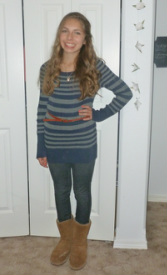
Tip 3: Look for name brands- Always keep an eye out for your favorite brands. The best finds are when you see that Abercrombie dress for only a few dollars, when it is $70.00 new! Thrift shopping can be a great way to have those expensive name brand clothes without paying the name brand price!

Picture
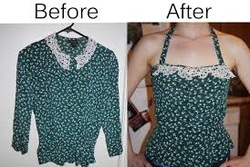
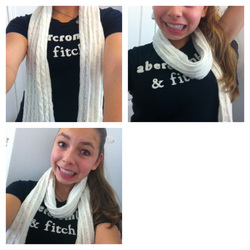
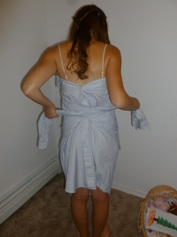
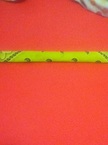
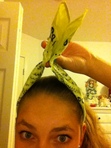
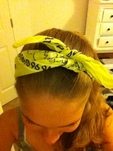
Tip 4: Up-cycling- This might be my favorite part of thrift shopping! Up-cycling is when you buy used clothes from a thrift store and cut, sew, and redesign them into a totally new piece of clothing. For example, you could buy a used shirt and cut the sleeves off for a cute tank top, or turn some old jeans into stylish shorts! It is really up to your imagination what you create! Always keep an eye out for items you could reconstruct!

Picture
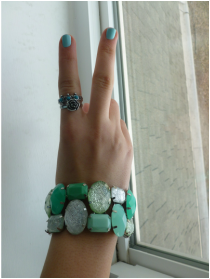
Tip 5: Think vintage- If you are one of those girls like me, who loves anything vintage, a thrift store is your best friend! Many items are from older people, and they are truly vintage! Always look for antiques and vintage pieces!

 
Picture
Spring is finally here, which means it's time to say hello to spring trends! One of the most popular trends has been the color mint! Here is all you need to know on styling this pretty pastel, as well as some outfit ideas!

Picture
Nail polish: Mint nail polish is super pretty and girly, and is the perfect color for spring! 
Styling it: When wearing mint polish make sure not to go too crazy with the designs, you don't want to take away from the gorgeous simplicity of the color. Need a design? Stick with simple white polk-a-dots, or a rose on your ring fi
Purchasing it: My all time favorite mint polish isApple" by Essie, but if you are looking for a cheaper alternative "Mint Sorbet" by Sally Hansen is also a great color, though it is a bit more on the green side. 

Picture
 Scarves: Ah, yes. One of my favorite accessories all year round...scarves! Why not incorporate the lovely mint color into our scarves?
Styling it: Light-weight scarves can add alot to any outfit! Pair a lacey mint scarf with a simple white tee for an instant casual spring look! There is really no wrong way to wear a scarf in the spring. My biggest tip would be to avoid wearing a mint tshirt or tank top with a scarf of the same shade! You want to wear mint, not have it wear you!
Purchasing it:  I got the lighter mint scarf on the left from Maurices! It is a lighter mint, and is super delicate and pretty with lace detailing. The one on the right, I recieved as a birthday gift from a friend. It is a darker, more green minty shade, and is perfect for a more casual look. If you don't have a Maurices (or a friend who buys you clothes) you can find minty scarves at lots of other stores too! Your best bets are Macy's, Target, and Forever 21, but more and more stores are starting to sell them! 

Picture
Jewelry: Mint-colored jewlery such as bracelets,rings,necklaces, and earrings are all great ways to spice up an outfit for spring!
Styling it: In the picture to the right I am wearing a mint gemstone bracelet and a minty ring, paired with rose ring. Make sure your mint isn't too overpowering;jewelry with mint accents can keep your color theme together, without looking like your painted in the color. You can also tone it down by mixing silver, white, or gold colored jewelry with your mint jewelry.
Purchasing it: My bracelet is from Maurices and the rings are from Claire's, but as I said with the scarfs, so many stores are selling mint accessories now! Just keep an eye out for a good deal! Claire's is a good place to start since there new spring line of jewelry includes a bunch of mint! 


+

Picture
Clothing: Probably the most common, and my favorite way to wear mint, is simply your clothing! 
Styling it: How to wear mint clothes, depends on clothing piece. One of the most popular pieces is mint pants! Style some mint shorts or pants with a white tank top or tee for a simple look. If you are feeling more daring, add a bright pink blazer! Wear it right, mint and pink look great together! Another way to style mint clothes is by pairing it with anything floral! A mint dress and floral cardigan or sweater gives a cute spring outfit for a date, or day out. A casual everyday outfit is to wear a mint cami with a dainty lace tank top on top, like I showed in the picture to the left. 


Picture
Style 1: The simple wrap-around- Start by just hanging the scarf on your neck. Next, take one end and wrap around your neck, then let it hang down. Adjust the scarf so both ends are even. You can loosen the middle part to fit your style. This is probably one of the most simple ways to wear a scarf but it is very cute with almost any type of scarf!

Picture
Style 2: Simple wrap-around inside-out- drape the scarf around your neck in the simple loop (shown above.) Now take the right end and pull it through the middle loop. Next, take the left end and pull it through the middle loop. Adjust the ends and middle loop so fit comfortably!

Picture
Style 3: The Parisian Knot- Start by folding your scarf in half and hanging it on your neck. There should be a loop on one side and the two ends on the other side. Take the two ends and pull them through the loop. Pull it through tightly then loosen the scarf so it fits comfortably. It's that simple! This style I like in the fall and winter because it keeps your neck really warm!

Picture
Style 4: Parisian Braid- Start with you scarf folded in half and draped over your neck as if you are doing the parisian knot (shown above.) Instead of pulling both ends through the loop, only pull one end through. Then take the other end and pull it under rather than over, to create a cool braid look. Adjust the scarf to fit comfortably.

Picture
Style 5: DIY infinity scarf- One very popular scarf is the infinity scarf (also known as the loop scarf or circle scarf!) If you don't have one you can easily make one out of any normal scarf! All you have to do is tie the ends of your scarf together to create a big loop. Like any infinity scarf, you put the loop around your neck and loop it as many times as you like or until it doesn't loop any more. Then you can loosen and adjust the loops to fit comfortably!

 
Hey girls! This is a quick and simple tutorial on how to turn a men's button up shirt into a cute strapless dress! It is SO EASY and it doesn't require any sewing or cutting. There is so many styles of dresses you can make but this is just on one of the many styles! Comment what you think of this cute ,do it yourself, dress!
Picture
Step 1: Find an old button up shirt that you can use! I went to a thrift store and bought a couple old shirts for only a few dollars but you can also ask to borrow one of your dad's or older brother's shirts. The longer the shirt, the longer your dress will be, so keep that in mind when your picking out a shirt. Also try to avoid shirts with thick cuffs on the sleeves because they don't look as good and are harder to tie.

Picture
Step 2: Put the shirt on like a strapless dress with the buttons in the back, and button it up as high as you can. It doesn't have to button up all the way! Leave the sleeves hanging in the front, and adjust the dress so it fits comfortably.

Picture
Step 3: Bring the sleeves to the back and tie them. Make sure they lay smoothly when you pull them back. 

Picture
Step 4: Bring the sleeves back to the front and tie. Adjust the ends to make a bow shape. That is your completed dress for this style! I hope you enjoyed this tutorial!

Fall fashion: OOTD

9/29/2012

 
Picture
The cooler autumn weather is just starting to roll in, which means we can start bringing out some of our cute and cozy fall clothing. Today I paired a long cotton sweater with some dark jeggings, boots, a belt, and a cute necklace to create this casual and cute outfit, that you can easily accomplish yourself. If you don't have a body-con style sweater dress look in your older sister's closet for a sweater that is a bit too long or big for you and if needed stretch it down to make it longer. This will create the tight fitting sweater "dress." Next, put on your favorite tight fitting jeggings or leggings (I liked the jeans look for this sweater.) Accessorize with a long necklace (I'm wearing an owl necklace from Claire's.) Tie the outfit together with a belt to add shape and a bit of personality to the outfit. I've found this outfit looks cute with almost any boots,  I wore my Bearpaw boots but really any will work so get creative. For my hair I decided to go with a style that has been extremely popular lately, french braids! I parted my hair to the side and french braided to about my ear, then pinned it back with bobbypins, and curled my hair with a wand curler. That completes today's OOTD (outfit of the day.) Please comment below what you think! 
Lots of Love,
Annelise <3

 
Picture
Hey girls! I have gotten a few requests to make a post about my current fashion obsession, so today I had some free time before soccer practice and I decided to post about my latest obsession: pearl earrings! My sister got a pair of pearl earrings for her birthday a few months ago and one day I decided to wear them to a fancy dinner. I got lots of compliments (the first sign of a great accessory.) The next day, I threw on a sweatshirt preparing myself for a cozy laid-back day. I had forgotten to take off the pearls but noticed they gave my cozy outfit a whole new look I loved. All this to say, I fell in love with them! I wear pearl earrings EVERYWHERE, and they always seem to match and add a cute touch to any outfit. If you aren't looking to spend a lot of money on real pearls, I've found fake ones look just as good! Comment below what you think :)
~Annelise <3


How to: Bandanas

9/26/2012

 
Picture
Bandanas are a cute way to add personality to a ponytail, bun, or any hairstyle! Recently, they have been one if my many obsessions, especially as the cool weather rolls in and I'm starting to wear more cozy sweatshirts. You can wear bandanas in SO many ways! This "how-to" is one of my favorite ways, what i call the "bandana bow." I hope you enjoy :)


Picture
Step 1: Choose any square bandana and fold one corner to the other to make a big triangle shape.

Picture
Step 2: Starting at the bottom corner (where the flaps unfold) start folding it upwards. You can fold as thick as you want depending on how you like it.

Picture
Step 3: Fold all the way up to the top! Your bandana should look like the picture shown!

Picture
Step 4: Now place the bandana on the underside of your hair/head so the ends are up on the top of your head. Try to make sure the ends are equal in length.

Picture
Step 5: Tie the ends twice so you the ends look bow-like. If they are too long you can tie it again to shorten them. Play with the ends until they look how you like.

Picture
Now you are finished! I love this look with ponytails and messy buns but you can do it with any hairstyle you like! Comment below what you think! 
Thanks,
Annelise <3