Recently, I had my birthday party with 5 of my closest friends! We had a scavenger hunt downtown at my town's walking mall. It was a blast and I knew as soon as I got home I had to share this inexpensive and fun party idea!
Party Summary:When guests arrived (we met at a park downtown) we split everyone into 2 teams with 3 people on each team. We gave each team the scavenger hunt list and a pen. Each team also had a camera and video camera (which wasn't hard since almost every teen has an Ipod, Iphone, or something of that sort with a camera.) We had one hour to complete as many items as we could off the list, video taping or taking a picture of each thing we did. Some of the things on the list included... hug a stranger, shake hands with a bearded man, find a Justin Bieber look-alike, sing "Call Me Maybe" in public, and other crazy tasks. We also had things on the list to find and take a picture of, such as a price tag with digits that add to 14, something with feathers, and a take-out menu. The final things on the list were themes such as love, something that changes everyday, something that never changes, something essiential but seldom noticed, and something where you wouldn't expect it to be. These final ones allowed the teams to be creative and interpret them in different ways. We were given an hour to complete as much of the list as we could, and we were told to meet up at the icecream parlor when our time was up. My team had a blast running all around downtown taking pictures and interacting with people! Everyone downtown had fun helping us complete the list, and we were suprised how quickly an hour went by! When we met up at the icecream parlor, we had icecream and opened gifts while my mom tallied up the scores. We all were cracking up watching the videos and pictures! The winning team won little gift bags with small prizes (candy, EOS lipbalm, nailpolish...etc.) Overall, it was a great party that barely cost anything!
Tips to hosting: Location is key for this party! A mall is a very convient place because there is lots of people, stores, and its pretty safe. If you are having it at a mall, make sure video taping is allowed ( I know some malls don't allow cameras or video cameras.) If you don't have a mall, downtown areas can be a nice place too! You can even have several locations, or have a chaperone driver (if you can't drive) bring you around to different stores and places.
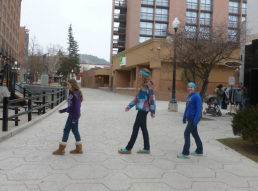
Some pictures from my party... (Blue team)
Party Summary:When guests arrived (we met at a park downtown) we split everyone into 2 teams with 3 people on each team. We gave each team the scavenger hunt list and a pen. Each team also had a camera and video camera (which wasn't hard since almost every teen has an Ipod, Iphone, or something of that sort with a camera.) We had one hour to complete as many items as we could off the list, video taping or taking a picture of each thing we did. Some of the things on the list included... hug a stranger, shake hands with a bearded man, find a Justin Bieber look-alike, sing "Call Me Maybe" in public, and other crazy tasks. We also had things on the list to find and take a picture of, such as a price tag with digits that add to 14, something with feathers, and a take-out menu. The final things on the list were themes such as love, something that changes everyday, something that never changes, something essiential but seldom noticed, and something where you wouldn't expect it to be. These final ones allowed the teams to be creative and interpret them in different ways. We were given an hour to complete as much of the list as we could, and we were told to meet up at the icecream parlor when our time was up. My team had a blast running all around downtown taking pictures and interacting with people! Everyone downtown had fun helping us complete the list, and we were suprised how quickly an hour went by! When we met up at the icecream parlor, we had icecream and opened gifts while my mom tallied up the scores. We all were cracking up watching the videos and pictures! The winning team won little gift bags with small prizes (candy, EOS lipbalm, nailpolish...etc.) Overall, it was a great party that barely cost anything!
Tips to hosting: Location is key for this party! A mall is a very convient place because there is lots of people, stores, and its pretty safe. If you are having it at a mall, make sure video taping is allowed ( I know some malls don't allow cameras or video cameras.) If you don't have a mall, downtown areas can be a nice place too! You can even have several locations, or have a chaperone driver (if you can't drive) bring you around to different stores and places.
Some pictures from my party... (Blue team)
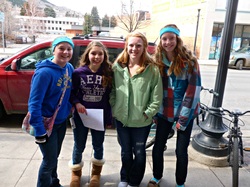
Take a picture with a red-head
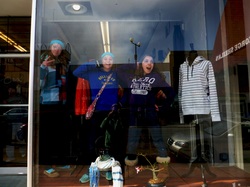
Act like mannequins in a window display

A Justin Beiber look-alike
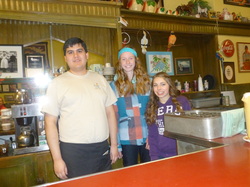
Someone in uniform
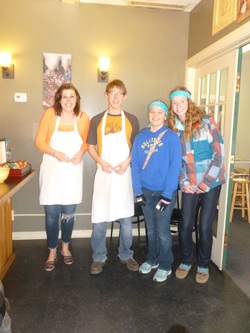
Chefs
a picture that would make a good album cover

 RSS Feed