Hi girls! Sorry for posting this later! This is is going my first monthly favorites post, in which I will tell you my favorite products, apps, food, and clothes of the month. I meant to make this a video but the video is not uploading correctly. So, to all of you who asked for a video post I promise one will be coming soon! Anyways, shoutout to my best friend Mary for suggesting this!  Ok, now onto my February favorites!
Picture
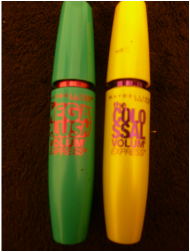
Mascara- My favorite mascaras this month are Maybelliene The Colossal Volume Express mascara and Maybelliene Mega Plush Volume Express mascara. I have been using both this month and I can't choose one over the other. Colossal gives your lashes lots of volume and gives the illusion of fake eyelashes. Mega Plush is better for an everyday look because it looks more natural. It gives length and seperates your lashes but unless you do more than one coat, it doesn't look very dramatic.

Picture
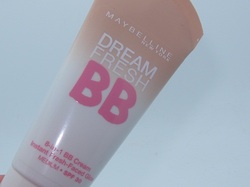
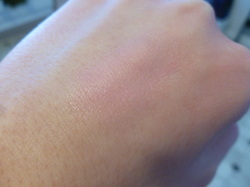
Face Product- My favorite face product for February is Maybelliene Dream Fresh BB Cream. BB Creams are great because they are moisturizers, sunscreen, and have light coverage. This BB Cream feels super light on your skin and looks really natural. My only complaint is that it doesn't come with alot of product.

Picture
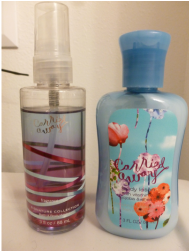
Scent- My favorite scent this month would definately be Carried Away from Bath and Body Works. I have worn this almost everyday this month and I am in love with this scent! It has a subtle fruity smell of raspberries and lemons mixed with floral scent of jasmine. Overall it is a very girly and fun scent, and the packaging is adorable! 

Picture
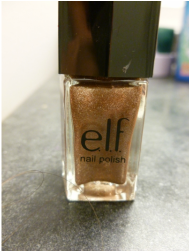
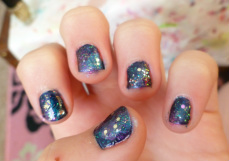
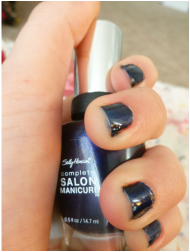
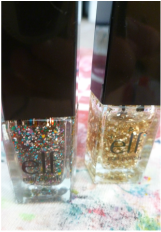
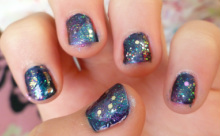
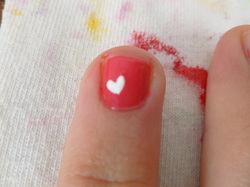
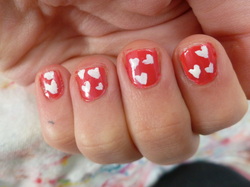
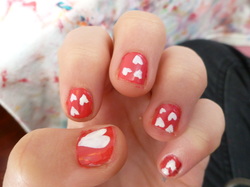
Nail Polish- I have painted my nails so many times this month, and I've been really into designs. But, my favorite solid nail color has been E.L.F. Blushing Beauty nail polish, which is a shimmery rose-gold and copper nail polish that almost looks like foil on your nails. It is gorgeous!

Picture
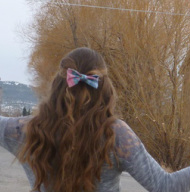
Hair Product/Accessory- February I have been absoutley obsessed with hair bows! I have gotten a ton of requests for a tutorial on how to make these so I will be sure to post one soon! Anyways, I have been wearing hair bows with anything from dresses to sweatshirts to give my outfit a very girly look (which is totally me!) 

Picture
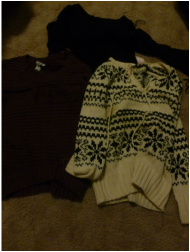
Clothing Item- My most worn and favorite clothing item this month has by far been oversized sweaters! Since it has been cold outside, I have been in love with big sweaters because they are so cozy, warm, and soft! I just can't get enough of them! 

That is all of my February favorites! Please comment if you have any favorites you want me to add to next month's favorites like favorite food or song. Comment your February favorites or post a picture on Instagram and tag me @livetolove_321 so I can see your favorites this month!

Galaxy Nails

2/16/2013

 
Picture
Lately, I have been really into painting my nails and finding new and fun nail designs! I have been painting my nails about every week, and I've found a lot of cute new styles. My favorite by far has been "galaxy nails." This cute design is so simple but looks as if the galaxy is on your fingernails. Here is a tutorial on how to achieve these awesome nails, that are way easier than they look!

Picture
Step 1: Paint your nails a dark blue or black. I'm using Sally Hansen Complete Salon Manicure nail polish in the color "Navy Baby."  Black will work better, but I don't own a black nail polish right now. This is going to be your "sky" or base color. 

Picture
Step 2: Apply a sparkly pink to the smaller end of a makeup sponge. I'm using Claire's flying saucer pink from the Starstruck collection. It is a pretty bright pink that is very shiny and sparkly. Make sure the polish doesn't have actual glitter pieces in it.

Picture
Step 3: Dab the sponge onto your nails in random spots. Don't cover the entire nail, just splotch the pink on randomly. 

Picture
Step 4: Likewise to the pink paint a sparkly bright blue onto your sponge. I'm using Claire's nail polish in "Fresh Water."  Again, you don't want actual glitter pieces in the polish. If your blue is not sparkly, it will still work, but it won't stand out quite as much. 

Picture
Step 5: Again, similar to the pink, dab the sponge with the blue polish onto your nails in random spots. You shouldn't need to repaint the sponge, because you don't want the polish to be too thick on your nail. You should splotch on thin layers. 

Picture
Step 6: Now time to add some stars to your sky! Use a clear polish with small glitter and swipe it on top of your nail. The glitter really looks like stars! I'm using L.A. Colors Color Craze BCC557 nail polish. 

Picture
Step 7: To finish off the galaxy add some planets! Any glitter polish with big pieces of glitter will work. When applying the glitter don't swipe it onto your nail! You only want two or three pieces of glitter or "planets" on each nail, so carefully dab the glitter onto your nails in random spots. I used two different glitter nail polishes for this step: Elf Chic Confetti and Elf Gold Star.

Picture
Step 8: Finish your nails off with a clear top coat and you are done! Comment what you think, or post a picture on instagram and tag me (@livetolove_321) to show me your nails! Thanks for reading! I will see you all next Saturday for new posts!

 
Valentine's Day is just around the corner! Try out this cute and simple nail design!
Picture
Start by painting your nails a bright pink base. If you want a more subtle girly look, use a lighter pink. I'm using bright pink by L.A. Colors.

Picture
Using a white nail polish make a small oval to the left

Picture
Paint another to the right and connect them to make a heart.

Picture
Paint small hearts on all your fingers except for your thumb

Picture
On your thumb paint a bigger heart that takes up most of the nail. Finish with a clear top coat and let dry.

DIY Cream Blush

2/10/2013

 
Hi girls! Cream blushes are great for giving you a natural glow and adding color to your face. But, if you are like me, you don't want to go out and spend $10 or more on an overpriced cream blush! This is a super simple way to make your own cream blush using inexpensive items, or extra makeup, that will give you the same results! This idea was from one of my best friend's Kayla L!
Picture
Step 1: Find an old makeup tin or small container to use. This was an old powder compact that I am using. If you still have a little powder or product left scrape it out and clean out your container.

Picture
Step 2: Grab a lipstick you don't use or and old one. You can also buy a cheap one to use from the dollar store. I'm using the lipstick side from an L.A. Colors Lipgloss and Lipstick Duo I bought at the dollar store, in the shade "Twinkle."

Picture
Step 3: Cut off the "bullet" of the lipstick. (If you want to continue using the lipstick after the project then set the bullet aside and see step 4.) Scrape the contents out from inside the tube. Place the bullet and all product into your container.

Picture
Step 4 (optional) : If you are wanting to continue using your lipstick then after scraping out the product from the tube, replace the bullet into the tube. It should be good as new, and you can use your lipstick again.

Picture
Step 5: Smush your product into your container, and add a small scoop of pertoleum jelly in with it.

Picture
Step 6: Mix the ingrediants together and spread it evenly into your container. Heat the mixture in the microwave for 10 seconds at a time, until it is softer. (If you have a container with metal skip this step or transfer your product into a microwaveable container.) When the product or soft or liquid, pour it and smooth it into your container.

Picture
Step 7: Freeze your blush for 3-6 minutes, to set it. After that, you have your completed cream blush! To apply it just warm some up on your fingers, dab it onto your cheeks, and blend it. *Additional products can be added to your blush. You can mix lipsticks, scrape in eyeshadow, add face powder, or primer to make it longer lasting!

 
Picture
In need of an inexpensive and fun way to spice up your room while your displaying pictures? This is a quick and easy do-it-yourself craft that can add personality to any room! I was recently watching my favorite youtuber of all time, Bethany Mota (Macbarbie07) , and saw her video on this wall collage! I immediatley had to try it and it turned out so well I wanted to share it with all of you! Enjoy and comment what you think!

Picture
Step 1: Gather and print out all the pictures you want to display. Depending on how big you make the collage, you will need about 40-45 pictures. It works best if your pictures are all horizontal, but obviously I included some vertical ones too. Use pictures of friends, family, and things you love. Your collage should show off your personality and life. I got some pictures off of my Instagram, camera, ipod, and some old pictures from when I was young. 

Picture
Step 2: Lay out your pictures on the ground in the shape of a heart. Rearrage the pictures in the order you liketh best. Keep in mind, the collage is going to be pretty big, so your favorite pictures will be seen best in the middle of the heart. 

Picture
Step 3: Find an empty wall to hang your collage. Use masking tape to hang the photos into your heart. Once they are all on the wall how you want them, remove the masking tape one by one, and use glue dots or double-sided tape to hang your photos. You now have a cute, girly, and unique collage on your wall!